

Table of Contents
Using the Rownd Platform
You can set up an OIDC client directly through the Rownd platform: 1. Navigate to your application 2. Open the “App Keys” page on the left menu and click on the “OIDC Clients” tab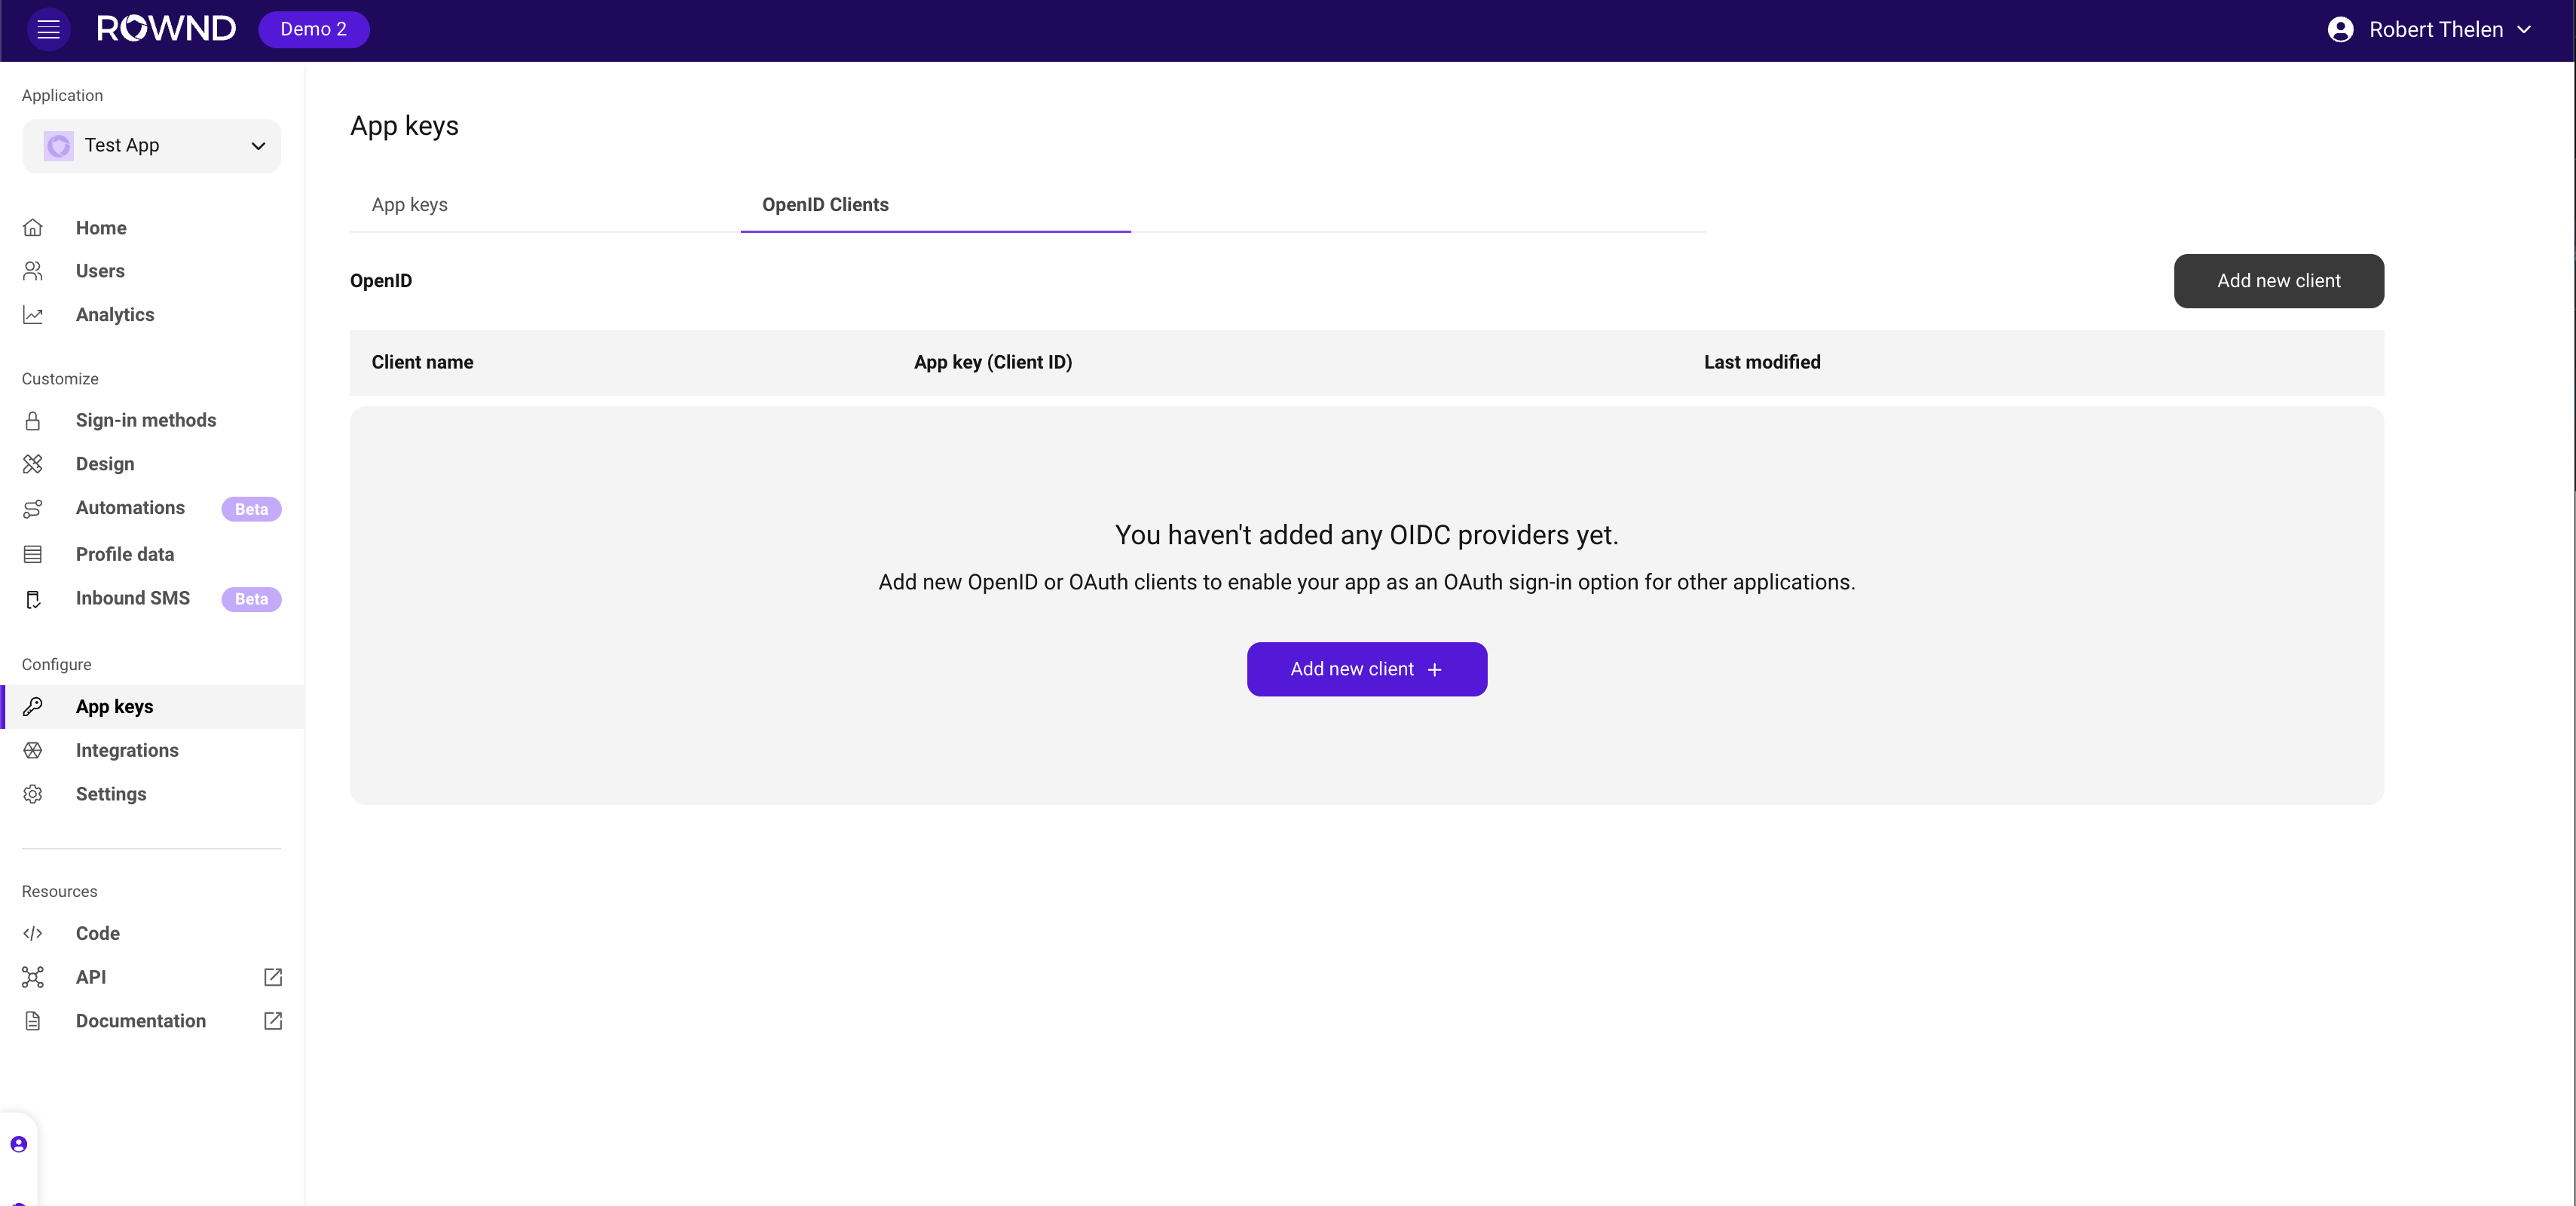 3. Click “Create New OIDC Client”
4. Set your OIDC client details
3. Click “Create New OIDC Client”
4. Set your OIDC client details
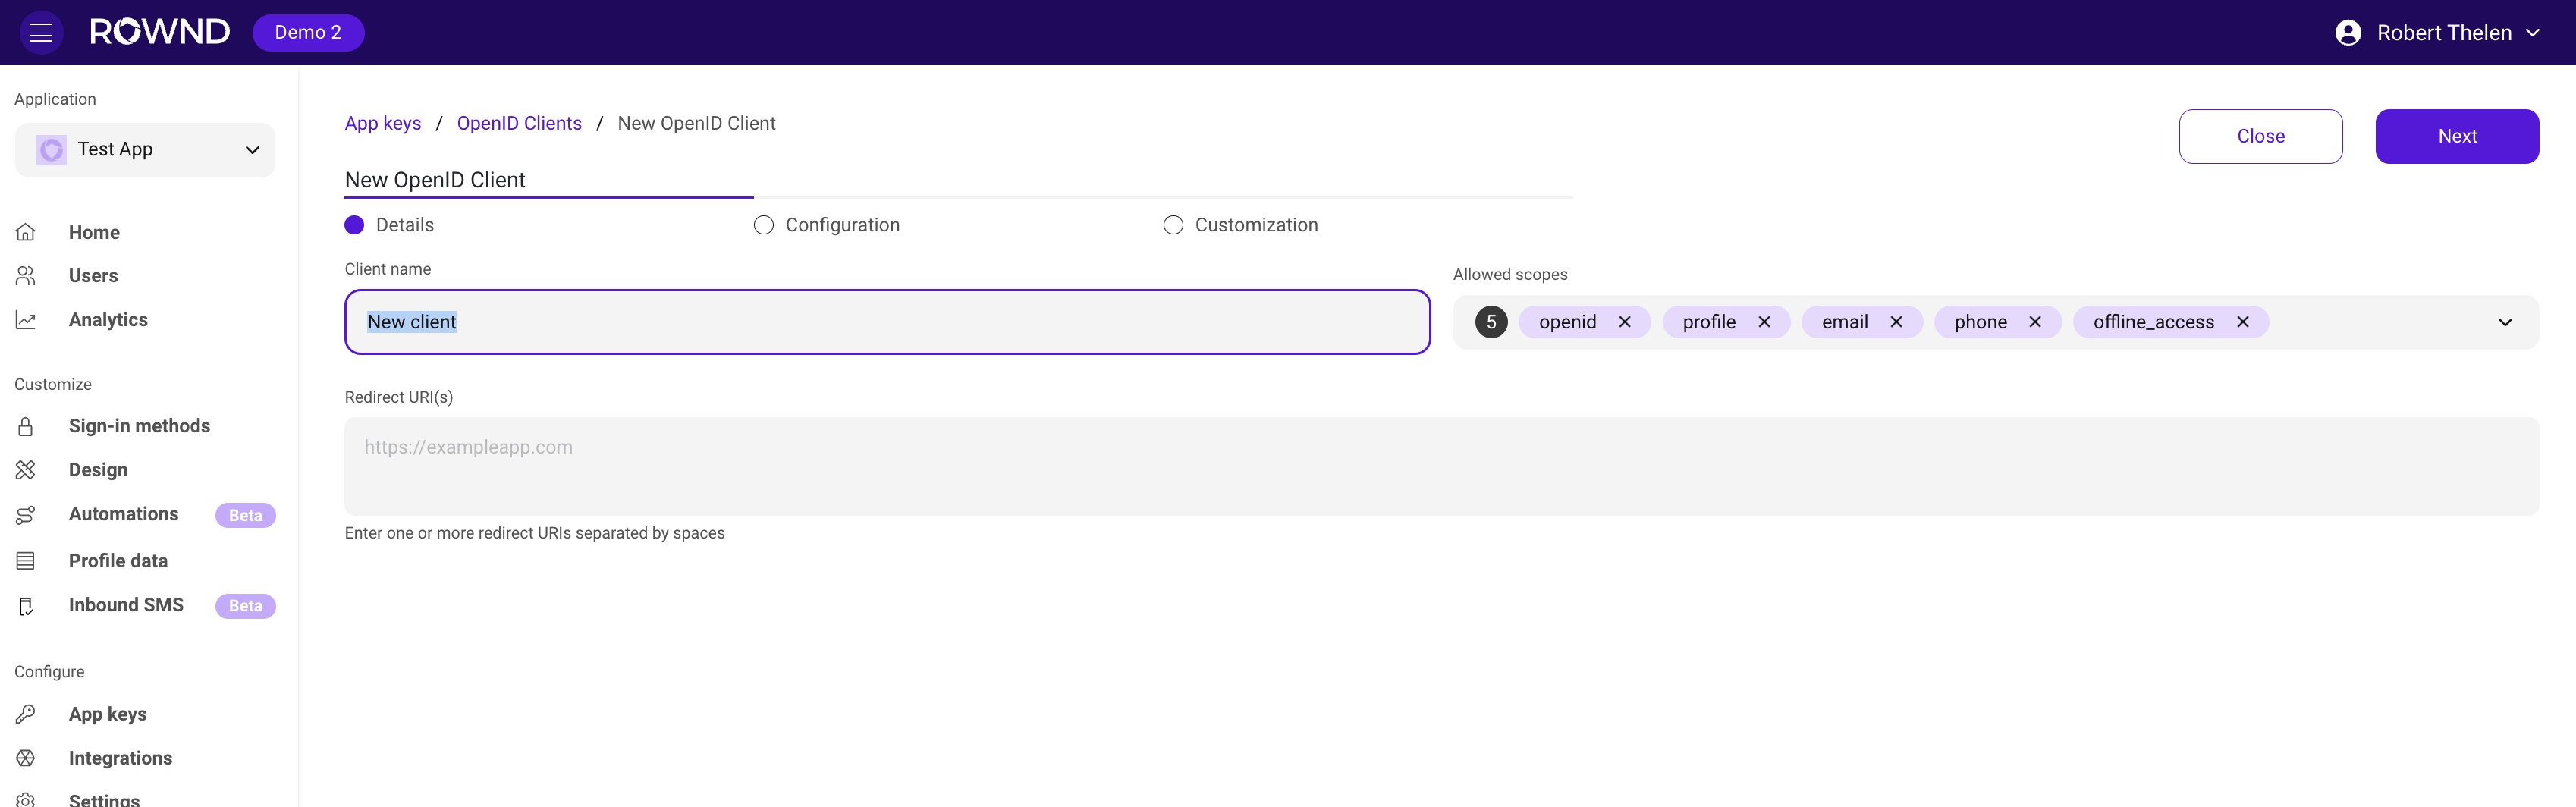
Fields
- Name: A display name for your OIDC client (required)
- Redirect URIs: Where users will be redirected after authentication (required). You can add more than one.
- Example:
https://example.com/callback
- Example:
- Allowed Scopes: The scopes that the OIDC client is allowed to request. You can add more than one.
- Example:
openid profile email; note; you can add additional date fields to Rownd for more finite scopes.
- Example:
Make sure to save your client credentials (client_id and secret) after creation, as the secret cannot be retrieved later.
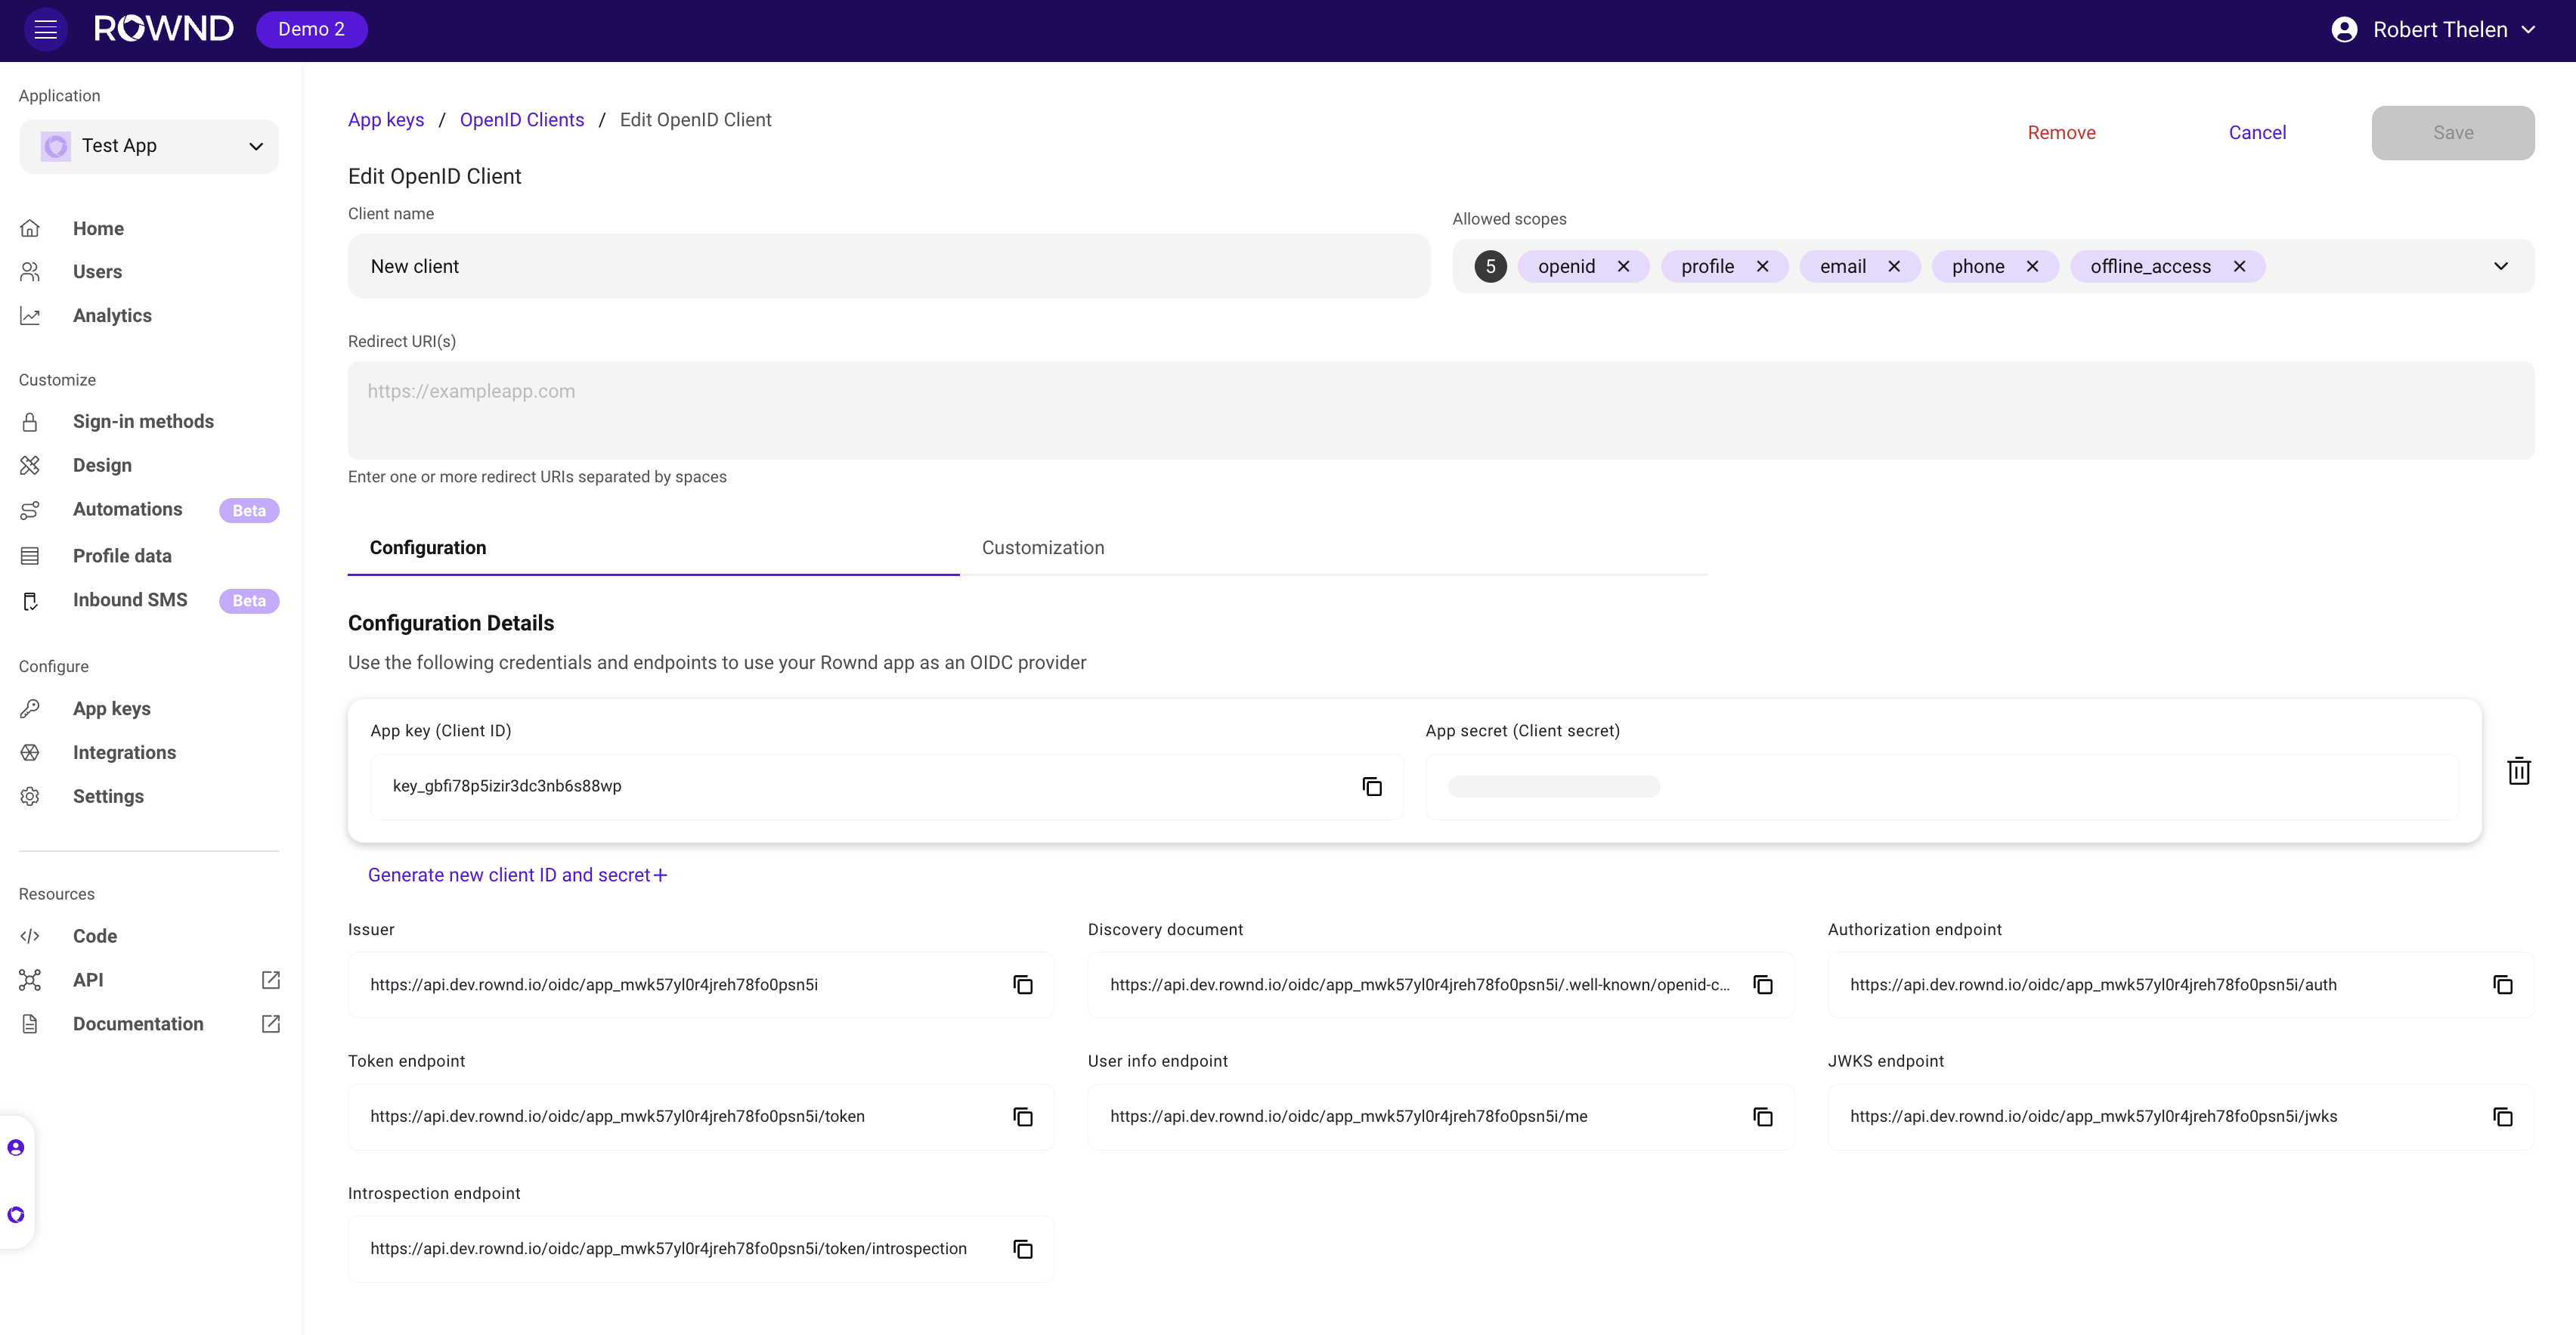 6. OIDC customizations
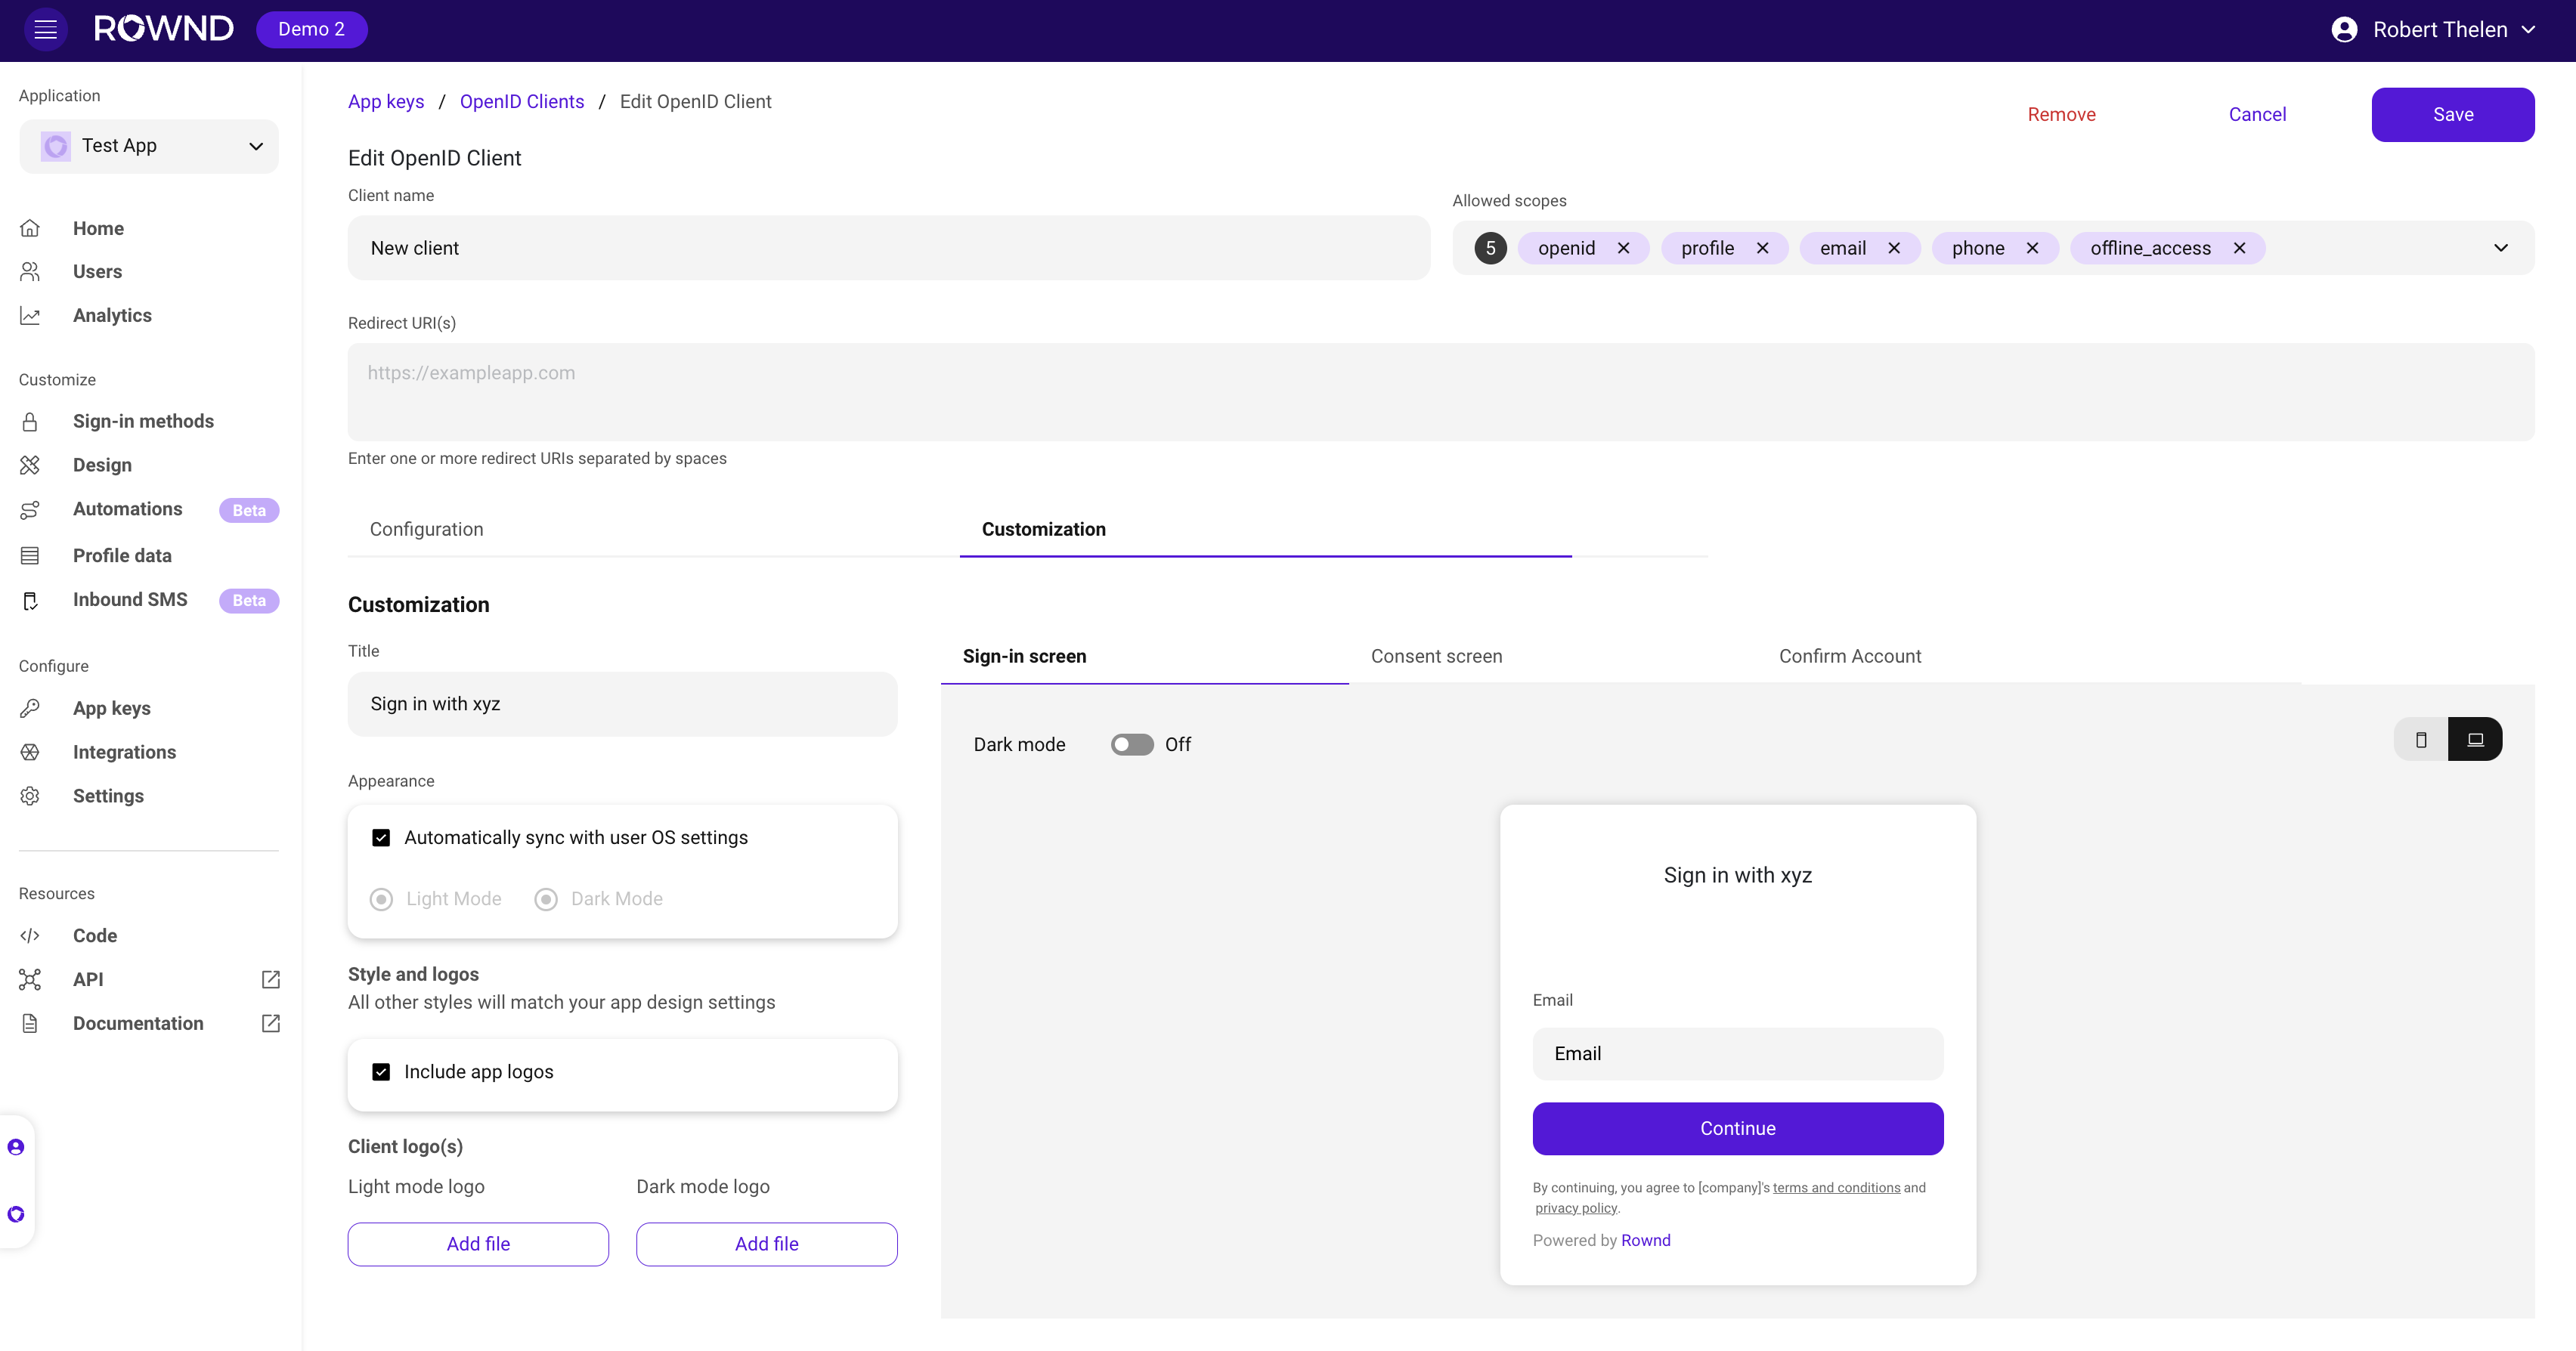
Click on “Customizations” to customize sign-in and consent modals with a call to action and logos that help your users stay in context.
6. OIDC customizations
Click on “Customizations” to customize sign-in and consent modals with a call to action and logos that help your users stay in context.
Using the API
To create or update an OIDC client configuration via the API, you’ll need your Rownd application credentials.Required headers
API endpoints
- Create:
POST https://api.rownd.io/applications/{app-id}/oidc-clients - Update:
PUT https://api.rownd.io/applications/{app-id}/oidc-clients/{client-id}
cURL Example
Replace
YOUR_APP_KEY, YOUR_APP_SECRET, and {app-id} with your actual Rownd application credentials and ID. For the update request, also replace {client-id} with your OIDC client ID.Configuration
Refer to the Rownd OpenID Connect API documentation for detailed information on creating and managing OpenID clients. To create a new OIDC client configuration, send a POST request toapi.rownd.io/applications/{app-id}/oidc-clients with the following body parameters:
Request Body Parameters
Example Request
Response Format
Both POST and PUT requests will return a response with the following structure:Response Fields
Credentials Object
Store the
client_id and secret securely as they will be needed for all subsequent OIDC operations.OpenID Configuration Discovery
Rownd provides a standard OpenID Configuration discovery endpoint that returns a complete list of OIDC specifications and endpoints for your application.Discovery Endpoint
{app_id} with your Rownd application ID to get the complete OIDC configuration for your app. For example:
The discovery endpoint is publicly accessible and does not require authentication. It’s commonly used by OIDC clients to automatically configure themselves.
OpenID Endpoints
Rownd provides three main OIDC endpoints, all accessible athttps://api.rownd.io/oidc/{app-id}/:
1. Authorization Endpoint (/auth)
- Used to authenticate users and obtain authorization
- Initiates the authentication flow
- Returns an authorization code that can be exchanged for tokens
- Supports standard OIDC parameters like
scope,response_type, andredirect_uri
2. Token Endpoint (/token)
- Exchanges authorization codes for access and ID tokens
- Supports refresh token requests
- Requires client authentication using client_id and client_secret
- Returns JWT tokens containing user information and access rights
3. UserInfo Endpoint (/me)
- Provides detailed information about the authenticated user
- Requires a valid access token
- Returns user profile data based on the granted scopes
- Supports standard OIDC claims
Credentials
After creating an OIDC client configuration, you’ll receive credentials in the response:client_id: Your unique client identifierclient_secret: Your client secret for secure communication
Implementation Flow
- Configure your OpenID client using the configuration endpoint
- Store the returned client_id and client_secret securely
- Implement the authorization flow:
- Direct users to the
/authendpoint for authentication - Handle the callback with the authorization code
- Exchange the code for tokens at the
/tokenendpoint - Fetch user information from the
/meendpoint as needed
- Direct users to the
Example Implementation
Best Practices
- Always use HTTPS for redirect URIs
- Implement proper token storage and refresh mechanisms
- Validate all tokens on your backend
- Keep your client_secret secure and never expose it in client-side code
- Implement proper error handling for all OIDC endpoints
Uploading OpenID Client Logos
You can upload custom logos for your OIDC client that will be displayed in light and dark modes. Logos can be uploaded using the following API endpoint.Logo Upload Endpoint
Parameters
Required Headers
Only PNG and SVG file formats are supported for logo uploads.
cURL Example
Advanced configuration
Custom interaction endpoint
By default, OpenID authentication flows direct users to a Rownd-hosted URL for sign-in. However, if you have Rownd integrated into your website or application, you can provide a custom interaction endpoint for a more streamlined experience. When configured, users will be directed to your site/app instead of the default Rownd URL. This provides several benefits:- Maintains your branded experience
- Leverages existing user sessions
- Reduces authentication steps when users are already logged in
- Provides a more seamless OIDC consent flow
Configuration
Add theinteraction_endpoint to your OIDC client configuration under the config object:
The interaction endpoint must be a page where the Rownd JavaScript snippet is properly installed and configured (a single-page app like React will also work). This ensures the authentication flow can properly handle the OpenID consent process.
User flow example
- User initiates OIDC sign-in from a third-party application
- Instead of going to
hub.rownd.io, they are redirected to your custom endpoint (e.g.,https://example.com/auth) - If the user is already signed in on your site:
- They only need to approve the OIDC consent
- No additional authentication is required
- If the user is not signed in:
- They’ll see your normal Rownd authentication flow
- After signing in, they’ll be prompted for OIDC consent
- After consent, they are redirected back to the original application